Showing posts with label knife making. Show all posts

Monday, July 12, 2021

Young Turk

I ran in to a young man who is just starting to make knives.  For the last two years he’s hammered, removed stock, taken classes, sharpened edges and dropped a lot of sweat on the ground.  Why?  Because David Pienta wants to be a master knife maker.  But the road is long and twisty and not everyone makes it, but he’s starting.  Right now he’s working with stainless Damascus steel he hammer forges himself.  

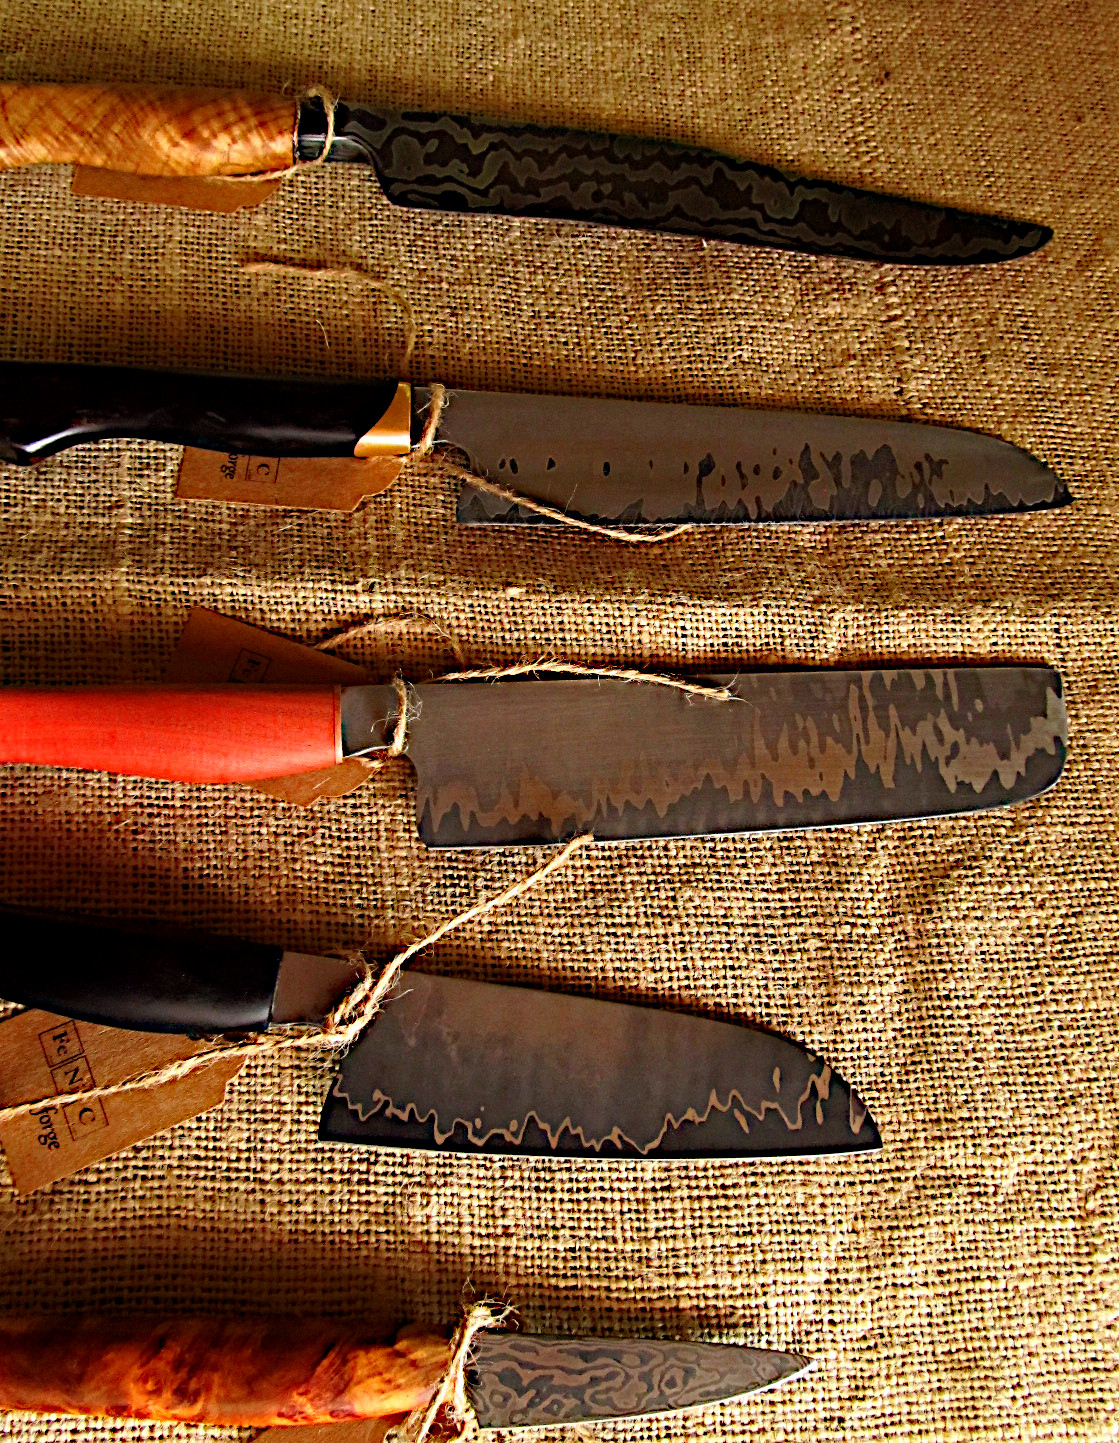
I bought the one on the bottom

The name of his forge?  Fenic Forge.  The name derives from the chemical symbols for iron, nickel and carbon, important elements in steel.  He doesn’t have a tang stamp yet and I urged him to.  Many of his knives are objet d'art and without a tang stamp their value will be less.  I’ve handled too many nice knives that everyone simply shrugged and said “Beats me who made it or what it is worth?”

Bold Tiger Stripe Damascus

We disagreed on the artistic nature of his stainless Damascus choppers.  He thinks they are practical Choppers.  Perhaps.  I think you will not see too many Damascus knives as choppers.  Yes, I know the maker has the edge on what he thinks his knives are for, but it is really up to the consumer.

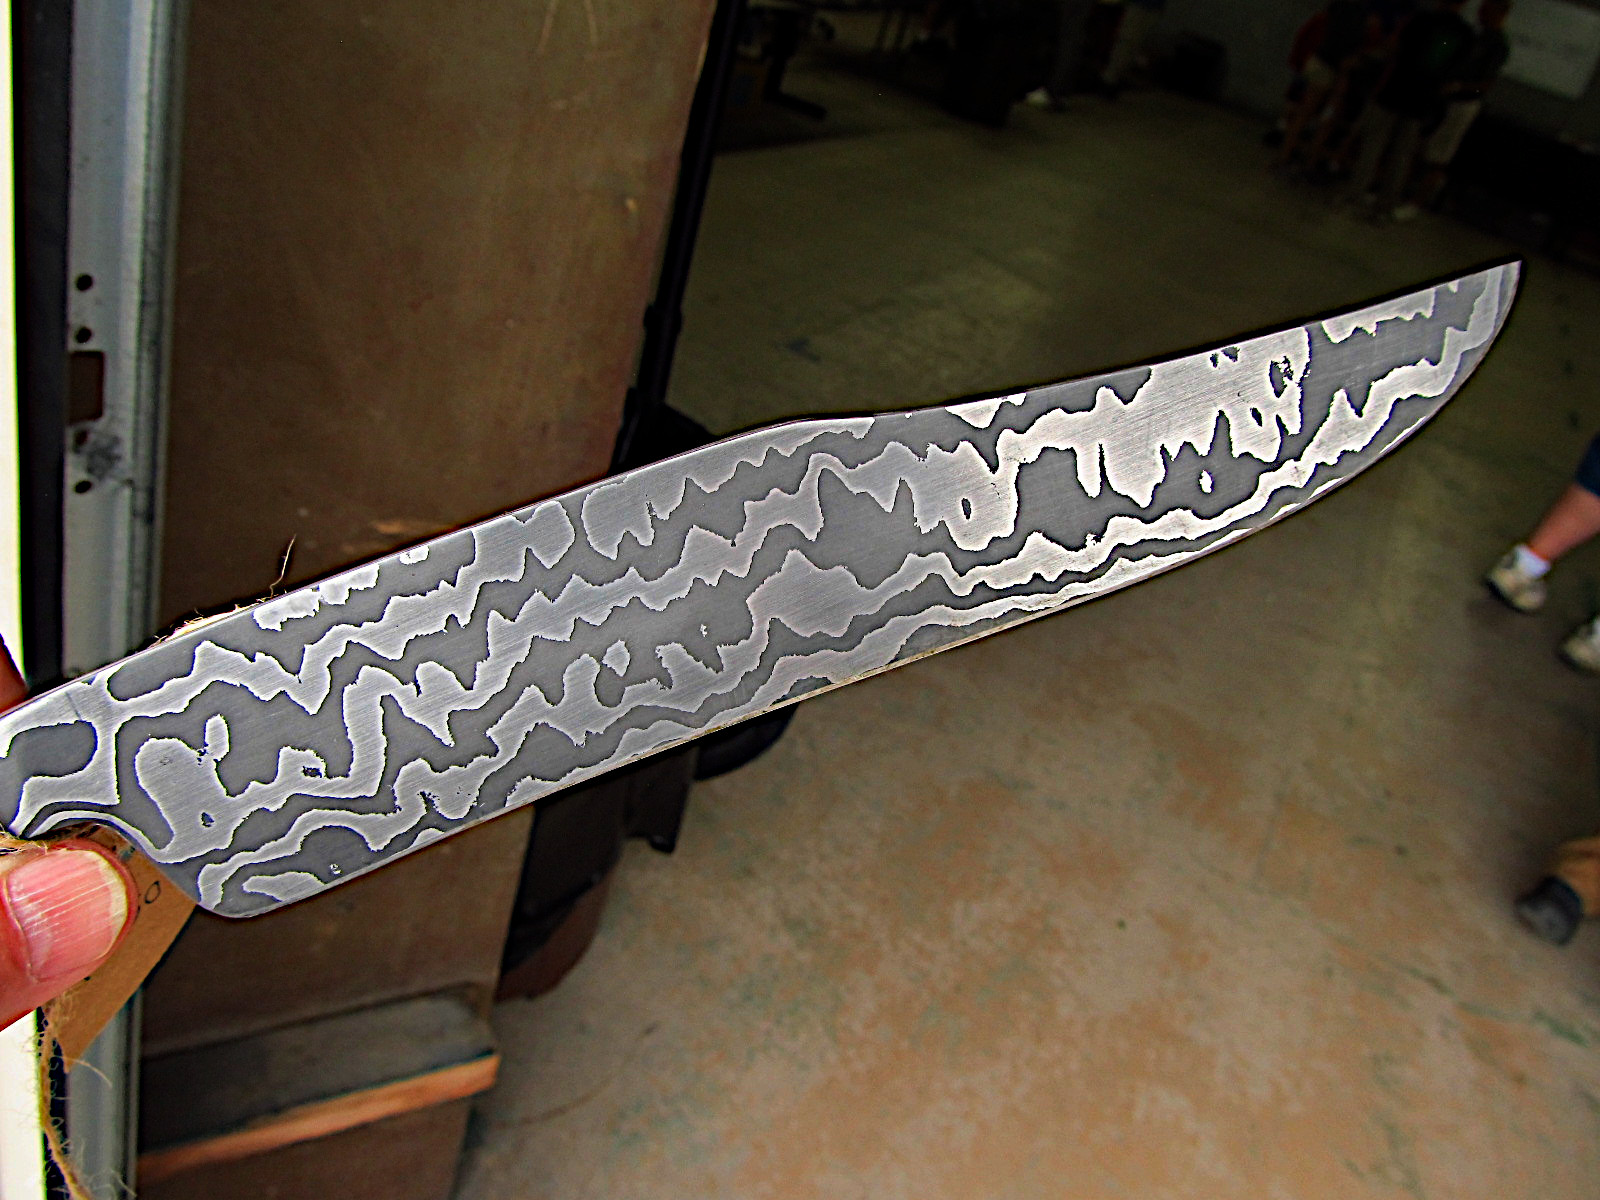
I bought a small kitchen utility knife, maybe seven layers of steel in an exotic burl handle. The handle has good symmetry and the blade has nice lines for a small working knife.  The small number of layers allows the differences in steel to be bold statements.  The working edge ends with a gap between the steel blade and the handle.  I like the way my finger sits in that place, so clearly defined with no worries of sliding onto the blade.


My kitchen utility knife

I’m going to sharpen it bit more and treat the handle to a good wax coating and Karen will have a special kitchen knife.

You can find David on Instagram or http://fenicforge.com/.

Saturday, October 19, 2019

Custom


Making a knife doesn’t mean you have to start with a lawn mower blade and a forge.  A variety of steels in terms of grade and types are available.  Also available are knife kits which in which the blade is  pre-shaped and sharpened.  These kits also come in a variety of completion.  Some have all the components and you assemble your knife. Other require a little more effort on your part.

Woodcraft offers a variety of learning projects so I signed up for the knife making.  I wanted to see how they handled epoxying and pinning handles.  As you’ve seen on Forged In Fire, pinning handles onto your knife is one of the major stumbling blocks for contestants.  They need to drill through steel, align holes, hammer pin in place while the five minute epoxy is hardening. 

knife making
Basic kit plus wood handles

Here’s my kit and I’m using a light olive wood for the handle.  The first step is to turn a 3/8 inch thick slab into two slabs.  The second is to tape your blade with removable painters tape.  Use lots of tape to protect your hands from the edge.  Safety first.

kit making
Turning one piece of wood into two

We traced the handle on the wood blanks making sure a square end of the wood are in  complete contact with the bolster, then on to the band saw.  Removing excess wood is a time saver, but leave enough just in case your handle needs to be finessed a little.  But really, a hand coping saw would have worked just as well.  You could just sand it all away too.

knife kits
Taped, trimmed, ready for epoxy

After you assure yourself each side of the knife’s handle has the correct cutout, the pins fit correctly and you’re happy with everything, dry fit it together again.  Can’t be too careful!

making a knife
Clamped

Now get the clamps out and mix your epoxy.  So, Bunkie, five or thirty minute epoxy?  The class used five minute because it is fast and we gave it a half hour.  I like the thirty minute or longer.  I want the longer time for fixing an “Oops!” and I believe longer cure epoxy is stronger.  While I have no plan to destroy an elk’s skull or batter the hood of a 1948 Ford pick-up truck with my knife, stronger always seems better to me.

After the epoxy is cured, it is sanding time.  Woodcraft has a variety of terrific sanders, rotary oscillators with different radius, belt sanders, disk sanders but all you really need is any sander you have and patience.  

kits
Sanding in process.
Your plan of attack is different from anyone else.  I like a rounded handle with a palm swell and flat top.  Start removing wood, but remember the Golden Rule of carpentry:  It’s easy to take wood off, very hard to put wood back.

Keep handling your knife.  How does it feel to you?  Too thick?  Too rough?  Edges sticking up?  Keep working.  And while you’re striving to make your knife, remember perfection is the enemy of accomplishment.  Experiment with it.  Do you want an asymmetric “D” shape handle or maybe oval facets?

adventure with knives
Finished


When you get it to the shape you want, move to a finer grit paper.  Work your way down to a finish you want.  How about polishing to a 4000 grit finish?  The wood starts to come alive the more sanding dust you create.

The wood finally explodes to life with a finish.  You can stain it, wax it, linseed oil it, urethane it.  That’s up to you.  I used a coating of flax seed oil.  Just a fancy name for linseed.  That a drying oil, so I left it outside in the sun to help cross link the finish.

kit knife
Just one variety of the steel and blade shapes available

It’s not perfect, but the next one I make will be better.  I know what to look for and what to watch for.  And I know how much fun it was.